
So here's my old lamp that was in my craft room. I don't even know where I got it...I think it was in my grandparents' house, it got passed down to my parents, sat in their basement for 10 years, and then I took it.
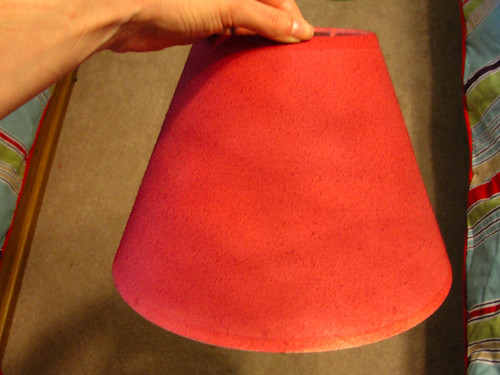
Anyway, it's the perfect size for the room, but the ugly off white shade was just not right. I wanted a bright red to match the bedding.

Solution? Spray paint...or so I thought. It did NOT work well and I didn't get the bright red I wanted.
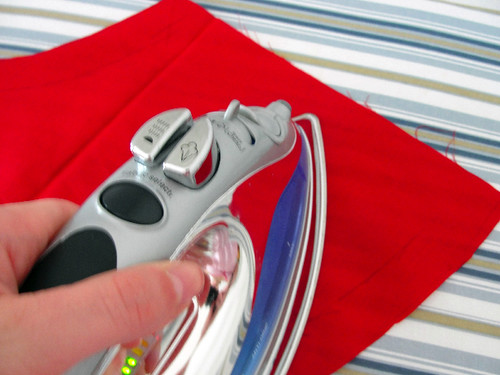
Plan B was to cover the shade in red fabric. First, I wanted to make sure the fabric was ironed. Any wrinkles in the fabric will never be able to be fixed once it's on the shade.
Then I spread the fabric on a flat surface and slowly rolled the shade around the fabric.
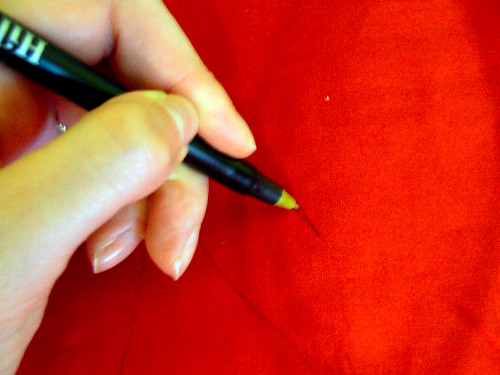
I traced the outline of the shade. Yeah, yeah, still using my pen to write on fabric, but I promise I have real fabric pencils now too! It's a bad habit to break!

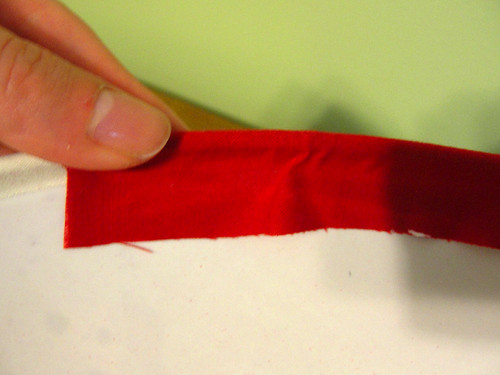
Then once I had the outline drawn, I enlarged the shape by 1 inch on each edge so there would be extra to wrap around the inside of the shade.
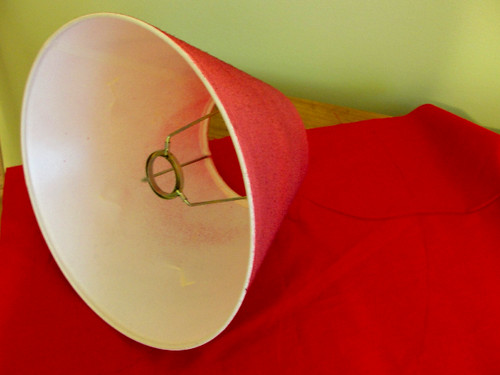
I cut out the fabric and slowly wrapped it around the shade. Using tacky glue, I wrapped the edges of the fabric to the inside of the shade and glued. It worked best to only do a few inches at a time.
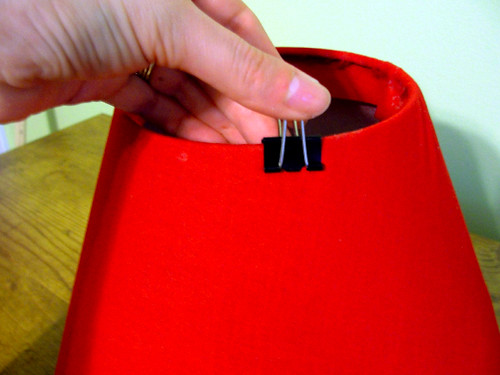
After each section, I let the glue dry. If it works better, use paper clips or binder clips to keep the fabric from moving while it dries.
When the shade was completely wrapped, I folded over the edge to give the overlapped area a finished look. Then I glued the edge closed.

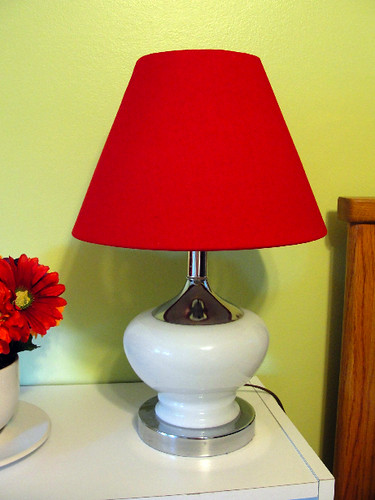
And here's my finished lamp!
It was super easy, took less than an hour, and only cost me a couple bucks for the fabric!
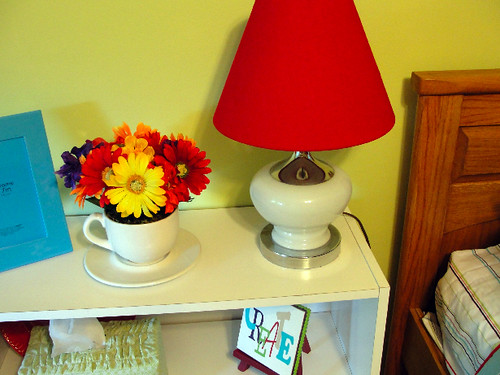
The red fabric could not match any better!


Very bright and pretty...love the retro vibe to the whole room.
ReplyDeleteI can't believe how much better that lamp looks with the red shade!
ReplyDeleteI have two lamps with boring shades I've been staring at for a while now. You've just inspired me to do something about it. Thanks!
♥ Rebecca Jean
Midnight Maniac
This looks just perfect in the room!!
ReplyDeleteCute! I love the pop of color it adds.
ReplyDeleteGreat job Lisa! It turned out great! I love the yellow wall with the red and the bedding is too cute! Looks great! You're right about the pen habit being hard to break - I find myself using pencils on fabric instead of my fabric pens. Oh well!
ReplyDeleteOMGosh, your lampshade turned out soooo cute Ÿ You make it look so easy.
ReplyDeletecute!! great job :)
ReplyDeleteLooks great! Love the bright colors in this room!
ReplyDeleteI have been wanting to try this. Looks great!
ReplyDelete-Rene
I love this! It looks so good. Now if you could please cover upholster a chair and/or couch, I could really use that.
ReplyDelete<3, New Follower
Wow-way to morph it into a completely different lamp-that looks awesome, I wish i had your creativity!
ReplyDeleteWhat a great makeover of the lamp! Beautiful!
ReplyDeleteOh it looks just great! Thanks for stopping by ThreeBoys and leaving such a sweet comment:)
ReplyDeleteGood idea!
ReplyDeleteThanks for the tutorial. This is exactly what I want to do with my lampshade. Now, I know how to do it!
ReplyDeleteNice. I love red---it's such a wonderful accent color. Great solution to your lampshade!
ReplyDeleteWow! Great job! I love that bright red. I'll have to think about whether I can use this idea on any of my lamps. Thanks for stopping by.
ReplyDeleteI have a lamp that was begging for this tutorial. I have never tried to do this...but I must do it soon!
ReplyDelete