Monday, January 30, 2012

Footprint Valentines

Connor is only 5 months old, but I'm already making him do crafts! We did something similar for Halloween and everyone loved it, so I figured we'd do one for his first Valentine's Day too.

Like we did last time, painting projects seem to work best in the bathroom and right by the bathtub. I sat him in his little tub on the bathroom counter and he giggled. My craftiness is rubbing off on him!
I used some fingerpaint and a foam brush to apply it to his feet.

It worked best to leave him sitting in the tub and bring the paper up to his foot to stamp it.

On the back side, I printed out a little poem that I found online. (Sorry, I forgot to write down the source, so if it's yours, let me know)
S.W.A.K. (Sealed with a kiss) and mailed out to some friends and family for the holiday!

Monday, January 23, 2012

Valentine's Day Decorating

I'm embarrassed to say I'm a little behind on the decorating this year. I love decorating for Valentine's Day because it's a holiday about love and has nothing to do with religion. I also think the decor & accessories are so cute, so it's tempting to want to buy & make it all!

Time to bring out some of my favorites!

Felt Heart Wreath
This was all the rage with my friends last year. I ended up making a bunch of them when they all wanted their own!

Glittery XO Letters
I love these and I can just stick them in random places in the house to make it look a little more festive.

Paper Hearts Banner
This was a quickie project I did while watching tv a couple years ago. I wish I would have laminated it, but it's still holding up pretty well.
Happy decorating! Hopefully, I'll get to mine this weekend!

Monday, January 16, 2012

DIY Sew Pacifier Clips

Wow, looking back at these photos make me realize how much he's grown since I took them! Anyway, my cute son, Connor, is obsessed with his BFF - the pacifier. We always make sure he has one with him at all times. I got a couple pacifier clips for my baby shower, but I get sick of seeing the same ones all the time. Why not make a few of my own?
I based my measurements on the pacifier clips we already had since they seemed to work pretty well for us. I used a small piece of fabric that was about 4" x 10".

I folded both edges towards the middle and pinned them.

Then I ironed the folded fabric as shown below.
Once I unpinned, I folded the edges in towards the middle again.

I just used a simple straight stitch to close the fabric strap.
Most craft store sell these clips. I took my fabric strip and folded it over the metal loops.

To hide the unfinished edge, I just folded the fabric over a little and sewed it closed on the sewing machine.

On the other side of the fabric strip, I folded the edge over and sewed it closed too.

To add the loop, I made a tiny cut in the top of the strip.

I stuffed both ends of the loop inside and pinned them to the fabric.

Using my sewing machine, I just sewed back and forth a few times to keep the loop from coming loose.

And here's Connor showing off his new paci clip!

Very easy and fun to make them to match different outfits!

Monday, January 9, 2012

Angel Food Cake Roll

This is a great dessert for a few reasons:
1. It's pretty healthy. You can eat as much as you want and not feel guilty!
2. You can alter it in any way you want with different flavors.

With that said, you have no reason not to try it!

Adapted from here
Ingredients:
• 1 package angel food cake mix
• confectioners' sugar
• 2 - 8 oz. containers of low-fat yogurt (we used strawberry)
• 1 oz. package instant sugar-free vanilla pudding mix
• 5 drops red food coloring (to make the filling more strawberry pink)
• 8 oz. container non-fat Cool Whip

Line a jelly roll baking pan with waxed paper. (I forgot we had a jelly roll pan, so we used a cookie sheet and a 9x13 baking dish which both worked great.)

Prepare angel food cake according to package directions. Pour batter into prepared pan. (My batter made enough for 2 cakes)

Bake at 350 degrees for 10-15 minutes or until cake springs back when lightly touched. Let the cake cool for about 10 minutes.

Turn cake onto a kitchen towel dusted with confectioners' sugar. Gently peel off the waxed paper.


In a bowl, combine the yogurt, pudding mix, food coloring, and whipped topping.

Spread mixture evenly over cake to within 1/2 in. of edges. Roll up.

Cover and freeze. Remove from freezer 30 minutes before slicing.


After reading some of the comments on the original recipe, I found out all the different ways you can make filling with different flavors of pudding and yogurt. Even ice cream or jelly work!

Tuesday, January 3, 2012

Craft room organization

As I organize my craft room, I wanted to come up with ways to store my supplies so they would be neat, clean and easy to get to.

Remember my last post about the cute labels I made for these plastic storage totes?
DSC01408

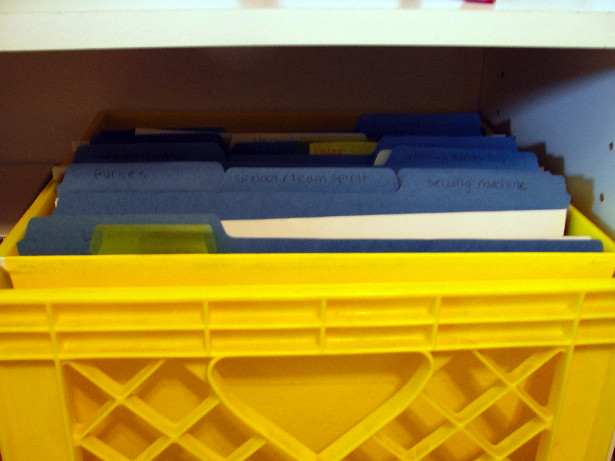
I want to show you the rest of the organization ideas I came up with in the room. I filed all my patterns and instructions for projects I've done in these file folders.
DSC01399

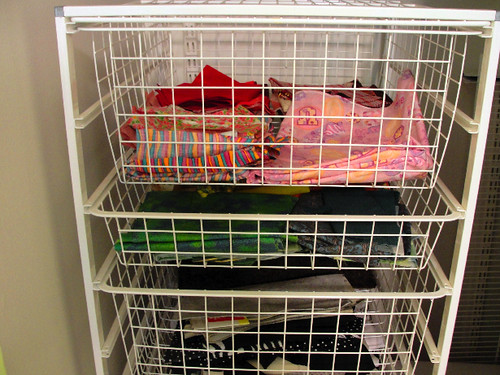
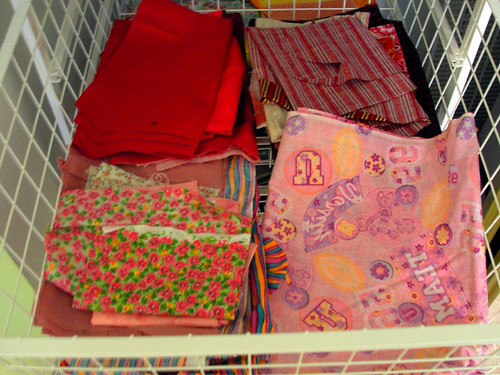
When we moved into our house, each room came with a set of Container Store wire drawers in every closet. Score! So instead of having all my fabric in plastic bags and huge boxes, I separated them by color and put them in the drawers.
DSC01401

These are quickly getting filled up!
DSC01402

I love how this looks and everything is so much more accessible.

If you'd like to see some of the other craft room projects I've done, go here for my DIY curtains, here for my sewing desk chair makeover, here for the pretty dresser makeover, and here for the coffee cup flower pot tutorial.

Linking up at these fun parties!

Related Posts with Thumbnails