Monday, January 31, 2011

Cinnamon Sugar Bread

This is one of those recipes where the photos don't turn out so well, but it tastes amazing. Bread doesn't look too exciting when you take a photo of it, but this was SO sugary sweet and yummy! It's more like a dessert than a bread, but who cares?!?

Note: I made this in the bread maker, but it can also be made in a loaf pan in the oven.

Ingredients:
• 1 cup milk
• 1 egg
• 1/4 cup applesauce
• 3 cups bread flour
• 1/2 cup sugar
• 1/2 t salt
• 1.5 t cinnamon
• 2 teaspoons yeast

Place ingredients in bread maker pan.

Set machine for quick bread or sweet bread.

When the machine is done mixing and starts to bake, open the top and sprinkle sugar on top of the bread.

Let bake for remaining time.

Dance around impatiently in the kitchen as you smell the bread and wait for it to cool.


See all those cinnamon and sugar pieces? YUM!
The bread was great with a quick spread of butter or a dip in some vanilla frosting.

Wednesday, January 26, 2011

Pretty Felt Heart Wreath

If you're into craft blogs, I'm sure you've seen this heart wreath all over this year. It's all the rage in the blog world for Valentine's Day 2011! My friend Christina at Finally Mom asked me to make her one and then a couple more friends requested one as well. How can I say no to my girls? Plus, they're super cute!

I used the tutorial from 
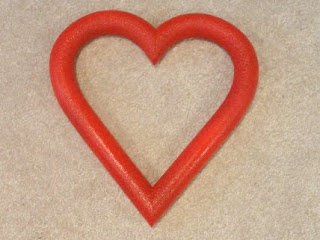
The Idea Room with a couple adjustments. It took 4 stores, but I bought out all the heart wreaths at the craft stores nearby.

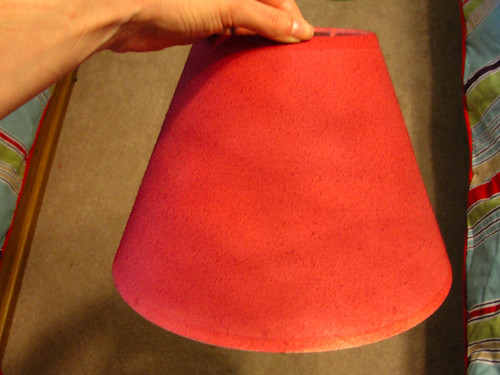
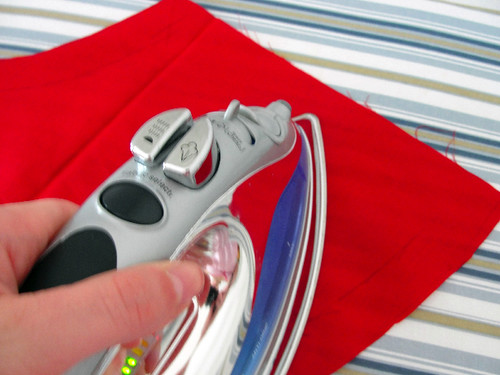
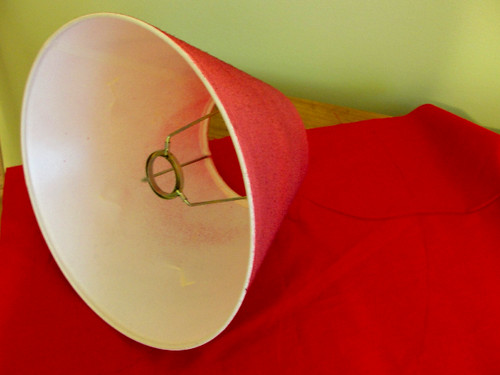
Since the felt pieces will only cover the front of the heart, I spray painted the back side red. It looks a lot better than the white foam sticking out on the sides.
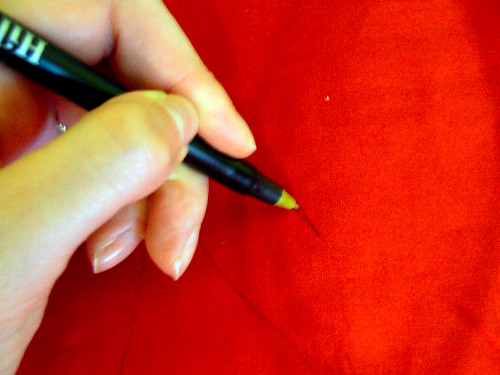
A yard of fabric was enough for me to make 3 full wreaths, so you only need about 1/3 of a yard for one wreath. I used a mug to trace circles on the felt. The diameter of the circles was about 2.5 inches.

How many circles do you need? Lucky you! I counted! I used between 100-115 per wreath. You can always add more, but I think 100 fills it pretty well.

I'd suggest sitting down to watch some tv while you do this because it can be a little monotonous. It works well to switch off between tracing circles and cutting so your hand doesn't get too sore from all the cutting!Once all the circles are cut, I took each circle and folded it in half. Then I folded it in half again so it becomes a little wedge.
Using a small pin, I inserted it into the corner of the wedge and then into the wreath. I didn't see any other blogs mention this, but I would suggest buying some dressmaker pins that are a little shorter than the standard size. The longer ones might poke out on the back and scratch your door.
Just keep folding and pinning as you go around the wreath. There's so special tip or pattern to doing this. You just adjust and place them as you want.
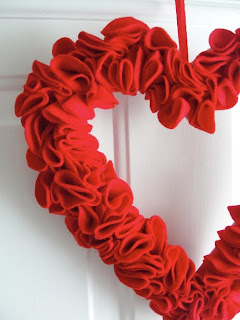
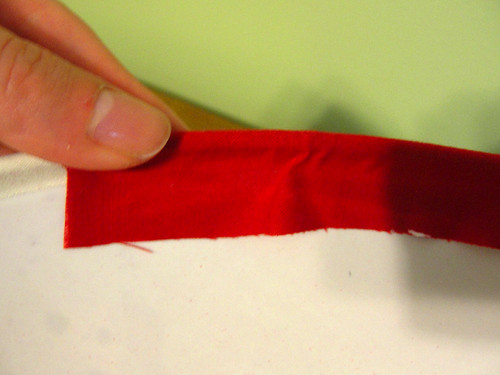
Once the wreath was completely covered in felt, I turned it over to add a hanging string. I took some red ribbon and tied a knot at one end. Using a few pins, I attached the ribbon to the back.
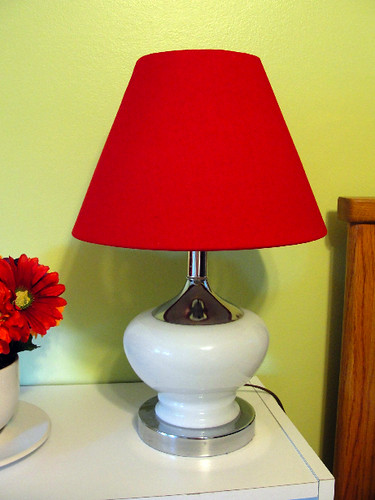
I love it! It's so pretty on the white door and it's perfect for Valentine's Day!
Some of my other ideas for future wreaths that I may try:
• glitter felt
• using multiple colors for one wreath (red, pink, white)
• adding little accessories like pearls, candy hearts, etc

Happy Valentine's Day!


Monday, January 24, 2011

Delicious Caprese Scallops

This is a great, healthy recipe that we tried last week. The flavor was great and we loved it!

Adapted from Savoring Time in the Kitchen
Ingredients:
• 1 tomato
• 6 basil leaves
• 1 red onion, sliced
• salt & pepper
• 3 T olive oil
• 1/2 lb scallops
• 1/2 of a lemon

Slice tomatoes and basil leaves. Pour into a large bowl.

Heat 1 T olive oil in a large pan. Season red onion with salt and pepper and pour into pan. Cook for 7 to 10 minutes.

Let cool and pour into bowl with tomato and basil.

Drizzle 1 T olive oil into the bowl.

Season scallops with salt, pepper and 1 T olive oil. Place in pan and cook for 5-7 minutes.

Arrange in large bowl over vegetables.

Squeeze the juice from half a lemon over the scallops and vegetables.


Aren't the colors gorgeous?

Yummy : )

Friday, January 21, 2011

Glittery XO Letters

I was walking around the craft store one day and this project popped into my head. A cute & easy way to decorate for Valentine's Day! I love Valentine's Day decorations because they're always adorable and they're not religious so everyone can appreciate them.

I bought two 3-D papier mache letters that were about 10 inches tall.
I found some really fun glittery red paper in the scrapbooking section and bought two sheets. I traced the letters onto the glitter paper and cut them out. I wanted paper to cover the front and the back of each letter so I made two X's and 2 O's.

Using some red acrylic paint, I painted the sides red to match the paper.
I used spray glue to attach the glitter paper to the letters and let the glue dry.
Glittery, sparkly, and fun!

Here's the letters on our bookshelf in the family room and I thought they worked well next to the frame I gave Hubby on our first Valentine's Day after only 2 weeks of dating. Gosh, we look young and innocent in that photo!


Wednesday, January 19, 2011

Simple & Tasty Pita Pizza

I don't know anyone who doesn't love pizza, but who wants to spend hours making dough or wasting all their calories for the week on a single meal?

Solution: pita pizzas! I came up with this recipe when we had my 8 year old cousin over for dinner. It was perfect for a quick meal and he loved making his own pizza.

Ingredients:
Add or subtract whatever you'd like, but these are some of the things we used.
• sliced red onion
• sliced tomato
• chopped spinach
• turkey pepperoni slices
• ground sausage (cooked quickly in a pan)
• shredded mozzarella cheese
• feta cheese
• pizza sauce
• oregano
• pita bread

Preheat oven to 350.

Spread pita bread on cookie sheets.

Add pizza sauce, veggies, meat, and top with cheese and a shake of oregano.

Cook for about 10 minutes or until golden brown on top.

This was Hubby's red onion, sausage, and pepperoni pizza.


This was my red onion, tomato, sausage, and feta pizza.
Enjoy!

Monday, January 17, 2011

Amazing Fireplace Transformation


This was our fireplace when we moved in to the 70's-tastic house. Even when we first walked in to view the house before buying, we knew it had to go QUICKLY. But this was not the best task to start with when we moved into the house. This fireplace was a HUGE undertaking and a lot more work than we originally thought. Basically, we wanted to cover up the ugly brick and build a mantle that would match our style. Sounds pretty straightforward, but it definitely wasn't!

If you want to see all of the horrible, but hilarious problems we went through, see this post.

We started out by building a mantle. The challenge was that we had that concrete slab in the middle of the wall that needed to be covered. The mantle had to be built around it so it would hide inside.

Instead of tearing out the brick, we covered the brick in drywall and then added durock in the area we wanted tile. By this time it was the middle of the winter and let's just say it was pretty cold working in a room with no cover on the fireplace! We had to start building fires when we needed things to dry or it would take forever! We tiled the hearth and area around the fireplace opening with a simple tan-colored tile to match the wall paint.

The next big challenge was how to add the tv, dvd player, cable box and all the wires without having stuff everywhere. I'll give Hubby all the credit on this as he was able to come up with a sneaky solution to this problem.

The solution: the room next to the family room is the laundry room and there was a little area of a closet that had no purpose. So we wired all of our component through the wall to these little shelves that Hubby built. Eventually, we'll redo the laundry room and make them pretty, but for now, this works great.

Here is our finished tv and mantle! As you can see, we also added crown moulding around the entire room and above the tv to give it a more finished look.
DSC01938

We have a remote that works through the wall so we can change channels with the cable box being in another room.
DSC01928

I love our tile choice. It looks great with the color of the wall and it's not too distracting from the mantle and tv.
DSC01940


DSC01929

Also, notice my initial fame on the right side that I made earlier in the year.
Go here for my tutorial.
DSC01936


Wednesday, January 12, 2011

Colorful Pin Cushion

DSC01660

How cute is this? I saw a great free pattern from Heather Bailey on her website and knew I had to make one. Of course, it must match the bedding in the craft room because I'm matchy-matchy like that : )

You can download the PDF and make one using her tutorial. It was super easy and I finished one while I watched tv!

DSC01655

Monday, January 10, 2011

Sweet peanut butter cookies

Hubby has figured out a new trick: we can pretty much make cookies any time we want just from the random stuff we have in the house. He knows I LOVE dessert so it's hard for me to refuse when he wants to bake for me! Anyway, he made these really yummy peanut butter cookies the other day and I had to share them with you.

Ingredients:
• 1 c sugar
• 1/2 c butter
• 1/2 c peanut butter
• 1 egg
• 1 1/4 c flour
• 3/4 t baking soda
• 1/2 t baking powder
• 1/4 t salt

Preheat the oven to 300.

Mix all ingredients in a large bowl.

Form a ball with the dough and wrap in plastic. Refrigerate the ball for at least 30 minutes.

When you're ready to bake the cookies, use a tablespoon to create small balls of cookie dough and place on a lightly-greased baking sheet.

Bake at 300 for 10-15 minutes or until golden brown.

These are amazing dipped in cold milk!

Friday, January 7, 2011

Easy Lamp Makeover Tutorial

DSC01708

So here's my old lamp that was in my craft room. I don't even know where I got it...I think it was in my grandparents' house, it got passed down to my parents, sat in their basement for 10 years, and then I took it.

Anyway, it's the perfect size for the room, but the ugly off white shade was just not right. I wanted a bright red to match the bedding.
DSC01608

Solution? Spray paint...or so I thought. It did NOT work well and I didn't get the bright red I wanted.
DSC01650

Plan B was to cover the shade in red fabric. First, I wanted to make sure the fabric was ironed. Any wrinkles in the fabric will never be able to be fixed once it's on the shade.
DSC01699

Then I spread the fabric on a flat surface and slowly rolled the shade around the fabric.
DSC01695

I traced the outline of the shade. Yeah, yeah, still using my pen to write on fabric, but I promise I have real fabric pencils now too! It's a bad habit to break!
DSC01694

Then once I had the outline drawn, I enlarged the shape by 1 inch on each edge so there would be extra to wrap around the inside of the shade.
DSC01698

I cut out the fabric and slowly wrapped it around the shade. Using tacky glue, I wrapped the edges of the fabric to the inside of the shade and glued. It worked best to only do a few inches at a time.
DSC01702

After each section, I let the glue dry. If it works better, use paper clips or binder clips to keep the fabric from moving while it dries.
DSC01706

When the shade was completely wrapped, I folded over the edge to give the overlapped area a finished look. Then I glued the edge closed.
DSC01703

And here's my finished lamp!
It was super easy, took less than an hour, and only cost me a couple bucks for the fabric!
DSC01710

The red fabric could not match any better!
DSC01709
Related Posts with Thumbnails