
I am SO excited to show you these super cute baby gifts I made for a friend's shower. Using these supplies, I made some fun things for a new mom decorating her nursery.
 Supplies:
wood door knob hangers (found at any craft store)
wood baby hangers (VERY hard to find! Container Store has them)
acrylic paint
paint brushes
Mod Podge (make sure it's the clear kind)
scrapbook paper
paint pens or markers
ribbon
stickers, lace, any other cute details you might want to add (optional)
Both of these crafts use the same techniques, so I combined the instructions to include both.
Start by painting your door knob hangers and baby hangers. If your hangers are glossy, they may need 2 coats of paint to cover them.

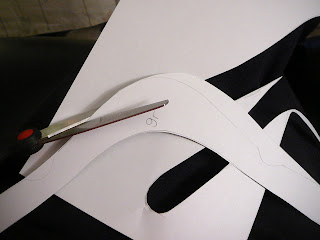
Trace the outline of your clothing hanger and door knob hanger on some scratch paper to create a template for your scrapbook paper. I took the image I traced and then made it about 5% smaller so the scrapbook paper wouldn't go right to the edge of the hanger. Either way works fine.

Cut our your templates.
 Trace your template onto scrapbook paper and cut it out. I cut out 2 shapes for each door knob hanger so there was one for the front and one for the back. I also cut out some thin strips to use for stripes.
Position your scrapbook pieces on your hanger to decide how you want to place them.

Apply Mod Podge to the back of the paper.

Carefully place your scrapbook paper shape onto the hanger. Make sure there are no wrinkles in the paper because once they dry, they will be really hard to fix.

When the paper dries, apply a thin coat of Mod Podge to the entire front of the hanger including all the wood and the paper.
 For the closet dividers, I printed out the words in a cute font.
You'll need:
Newborn
0-3 months
3-6 months
6-12 months
12-18 months
18-24 months
 You could go the easy route and just cut out the words and Mod Podge them to your hangers. You could also buy stickers or hand-write these. But no, I needed to make it as complicated as possible! It took 3 trips to the craft store and a couple merchandise returns before I figured out the best way to do this.
Anyway, since I don't have a light table like we used to have in art class, I held the paper up to the window and used a pencil to trace the back side of all the letters and color them in. If you go this route, you probably only need 1 or 2 "months" and you can just reuse it for each hanger.

Cut out all the words and position them on your hanger. Use a mechanical pencil (without the lead sticking out) to trace over the letters. You'll see that the pencil you used on the back of the paper will be transferred to your hanger. (see picture below)

Color all your letters using a paint pen or marker.
 Add ribbon, stickers, and any other cute details.


 The door knob hangers can be tied to the clothing bar in the closet like this.


LOVE THESE!!! I have a friend having a baby soon, but the gender is a SURPRISE, so I might need to make one side girly and the other boyish! :) (She plans on having a houseful, so she can flip them when another one comes along!) THANKS for the idea! LOVE IT!
ReplyDeleteAdorable.
ReplyDelete