Showing posts with label animals. Show all posts

Monday, October 21, 2013

Toddler Spider Handprint Halloween Craft


It's been too long since we've done a fun craft with Connor.  As I started getting ready for Halloween, I came across this idea for spider handprints and I thought he'd really like it.  He's really into spiders right now, so this fit perfect with the holiday!

As usual, we do a lot of our painting in the bathtub so we can clean up easily.  Daddy helped paint his hands black with acrylic craft paint.

I held his hands down for each handprint.

A couple days later, once the paint was dry, Connor used glue to add some googly eyes to the spider.

I added some cute "Happy Halloween" messages, a date, and his name to each one.

I love how each one is a little different and has its own character!


Monday, May 13, 2013

Sew a Giraffe Softie Baby Toy

I love making homemade personal gifts for baby showers because it's such a fun time in the mother's life.  One of my friends had a baby shower so I wanted to make her a little gift to go with the registry items I bought.  After looking at some of Connor's favorite toys from when he was younger, I picked something that I thought would have appealed to him. The neck and legs are really easy for a baby to grab, the toy jingles, and the little tags are always a hit with babies.


I cut out a giraffe outline that I drew from some images I found online.
Then I traced the template on some fabric for a front and back.
I pinned the two pieces with right sides together and left openings for the taggie ribbons.
This was probably the most difficult part. I cut some small loops and then tried to arrange and pin them so they would look good when they were overlapping.

I put the loops on the INSIDE of the giraffe so that when he's turned right-side out, the loops will be on the outside.
I sewed around the edges, but left a small opening to turn the fabric right-side out.
I filled it with stuffing...
...and then added a small pouch with some jingle bells.
A few stitches by hand will close up the hole and it's done.
Hopefully, the giraffe will be a lot of fun to play with once the little one is a few months old!
And it was a boy! (in case you were wondering...)


Tuesday, December 11, 2012

DIY Stuffed Fleece Penguins

Aren't they the cutest? 
 I'm so in love with them!

I can't take credit for this pattern.  I used a book called Wild and Wonderful Fleece Animals by Linda Carr.  The penguin pattern comes in the book and then I enlarged the pattern to make them much bigger.  I also added the glittery silver ribbons around their neck to make them a little more festive.


They're so adorable on by the fireplace for the holidays!


Thursday, June 14, 2012

DIY Sew a Vinyl Play Mat

Babies are messy. They drool, they spit, and they poop. Connor loves to hang out on the floor and play, but we try to keep his mess contained to a small area that's easy to clean. I came with the idea of a vinyl play mat and it works really well for an easy clean up!

I bought a cheap tablecloth, washed it, and cut it down into a small rectangle.
To finish the edges, I used a zig zag stitch in light blue thread.

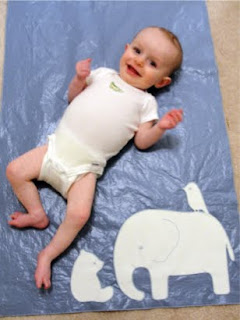
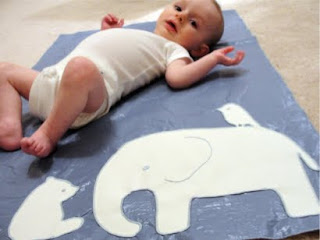
Just to make it more cute, I printed out these little animal silhouettes and traced them onto some white fabric. This wasn't vinyl, but it was vinyl-ish and kinda soft, so it worked.

I did some simple hand-embroidering for the eyes and ears.

I pinned the animals to one corner of the vinyl. The vinyl is hard to get completely flat and you can't iron it, but I did my best.

I used a tight zig-zag stitch to applique them onto the vinyl.

Here's Connor showing off his new play mat!

Like a proud mom, I had to take a million pictures!


Tuesday, July 5, 2011

Cute Fleece Dog Bib

I might be going a little overboard with the bib crafts, but they're all so cute! And maybe this isn't the most practical bib, but I couldn't resist trying it when I saw it!

Adapted from the book, Sewing for Tiny Tots by Susan Cousineau. My bib design is based on the book, but adjusted slightly to make it my own.

I mentioned in a previous post that it's way cheaper to buy an old piece of clothing from a thrift store rather than off the bolt at a craft store. Plus, I love that this is already worn in and won't pill as much right away since it's been washed multiple times already.
The book gives you a pattern that you can copy and enlarge to the size you want. The book suggests enlarging it 400%, but that seemed huge to me, so I cut it down to 300% for a newborn.
I cut out all the pieces from the fleece shirt and a scrap of felt.
I used a blanket stitch to outline the felt pieces for the spots and nose. The book suggested basting all the felt onto the dog face, but I felt like fusible webbing would work much better. I traced the felt pieces onto the fusible fabric and ironed them onto the face and ears.
Sewing the mouth onto the dog was a little tricky for me and I forgot to take pictures because I got so frustrated. I couldn't come up with a good way to get the lines onto the fleece so I would know where to sew. My final solution was to use a piece of tracing paper with the face drawn on it. I pinned the tracing paper to the fleece face and sewed right through both pieces. Then when I was done, I ripped the tracing paper off.

The eyes were another tricky thing. The book suggested using embroidery stitching or felt to make them. I really didn't want to mess with that after the tracing paper fiasco above. I found these doll eyes at the craft store and they worked great. Hubby cut off the ends with a pliers so they didn't stick out so much. Buttons would have worked well also.

I thought it might be fun to use some ribbon as the closure at the back of the bib rather than the usual velcro. Then the size can also be adjusted as the baby gets bigger.

A LOT of work for a bib that's just going to get dirty, but it was fun!

Related Posts with Thumbnails