Showing posts with label clothes. Show all posts

Friday, January 16, 2015

DIY Baby Onesie Dress

One of the best parts about having a baby girl is all the stuff you can make her to wear.  However, I pretty much avoid making her clothes because she grows out of them so fast that it's not even worth the effort.  These dresses were pretty easy, so I did do a few of them (back when I still had time) during maternity leave.  She never even got a chance to wear them, but I did take photos of her in them before they got too small! 

I pretty much followed this tutorial by Prudent Baby with a few tweaks of my own to create this little dress for her.

It's really nice to have the onesie attached and then you can always add leggings or tights over it too.

Pretty girl!

Wednesday, August 6, 2014

DIY Sew a Chevron Striped Maxi Knit Skirt

I actually made this last summer, but then I got pregnant and was never able to wear it.  Better late than never, right? Pleas excuse our messy closet, but this was the best I could do as we were running out of the house for our first date night since the baby was born!

Since I made it so long ago, I'm sad to say that I don't have a finished tutorial or progress photos.  However, I do have my notes and I used these two tutorials from icandyhandmade and Pretty Ditty as inspiration for the skirt, but mine has a thick elastic band at the waist rather than using the knit fabric from the skirt.

Honestly, it took a long time, so it's probably much easier just to buy one :)  But I've never been able to find a maxi skirt that was long enough, so this was my only choice!  One other tip I learned was that the striped fabric was actually too thin on it's own, so I had to go back and buy white fabric to make a second layer underneath.


Perfect for hot summer days and date nights!

Thursday, July 10, 2014

DIY Easy No-Sew Upcycled Baby Headbands

The baby headband DIYs continue!  I used an old t-shirt to make both of these and they were super easy to do.

This knotted headband by Love Stitched is made from an old t-shirt.


I used the leftover pieces from the one above to make this little bow headband.  It's just a 1 inch wide piece of t-shirt fabric and I used hot glue to attach the bow.

Apparently, she got a little bored durng our headband photoshoot...yawn!

And a little tongue!


And back to sleep!


Tuesday, August 20, 2013

DIY Sew an Elmo Sun Hat


This might not be the most thorough tutorial, but I wanted to post it just to give readers an idea of what I did.  To make a normal reversible sun hat, I found a tutorial on another blog.  (Sorry, I searched for awhile and I cannot remember which one it was!)  I picked Sesame Street fabric for one side and plain red fabric for the other side so I could add the Elmo face.  

Before I completely sewed the entire hat together, I started working on the Elmo face so I could make sure it fit on the hat.  I printed out a picture of his face that was resized to fit the hat.

I used some little scraps of fabric for the eyes, nose and mouth and two black buttons for the eyes.

Using my printout as a guide, I cut out the face shapes and ironed some fusible interfacing on the back to make them a little more stiff.  I sewed the buttons onto the eyes by hand and then used the machine to do the rest.

I carefully pinned the face pieces onto the hat and then used a zig-zag stitch to embroider them onto the hat.  Unfortunately, my sewing machine had a mind of its own that day, so the stitches don't look as nice as I wanted them to.
Here he is showing off the Elmo face on one side...
And the Sesame Street print on the other...


I love how it turned out and it's great to have two different hats in one!


Tuesday, July 23, 2013

How to Sew Straps on a Toddler Hat


Do you have a toddler who loves to take their hat off and throw it?  I do!  If I can distract him, he'll keep it on, so any help I can get with velcro straps are always appreciated.  It seems like most hats bigger than about 12 months don't come with straps (why not?) so I had to add my own to a couple of his summer hats.

I used one of the hats that does have straps as my guide when making my own.

I measured the straps on the hat above and used that number as a guide.  I added a couple extra inches onto my measurements and I could always cut them off later.  Better safe than sorry!  I cut two long pieces of fabric that were about 10 in. x 2 in.  I folded each one in half longways and pinned.

To get a good crease, I ironed the strips.

Once the fabric cooled, I opened the fold and then folded each edge in towards the middle (where the ironed crease is).  Again, I ironed the fabric.

After the fabric cools, fold each side in towards the middle again and you'll have a perfect crease. 

I took each strap and sewed a straight line down the side to keep the crease closed.  Then I added a little piece of velcro to each strip and sewed it on.

The tricky part is figuring out how long each strap needs to be to fit the child.  I used my hat with straps (shown above) as a guide and then tested it on my son to make sure it fit.

I cut off the excess fabric on each strip and then folded over the edge.  A couple stitches on the sewing machine was an easy way to attach the straps.

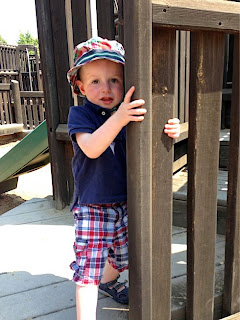
Here he is modeling his new hat on the 4th of July!

He actually loves wearing it too!

Monday, July 1, 2013

Shabby Apple Vintage Clothing Giveaway!


Summer is the perfect time to rock a cute little dress.  I am so in love with this vintage clothing from Shabby Apple!  There's something to appeal to every size, occasion, and personal style.  While I love dresses, I always feel self-conscious in them and never get the guts to wear them.  However, I might make an exception for these beautiful styles!

I'm loving some of these gorgeous vintage dresses at Shabby Apple that I think might be flattering on me like...

At First Sight

Animalia

Ipanema

Sleek Shadow
Champs Elysees

Happy Talk


Want to WIN vintage clothing from Shabby Apple?  I'm kinda jealous that one of you is going to win something pretty!

a Rafflecopter giveaway


Make sure to leave your name and email so I can get in touch with you if you win!

Good luck!

Friday, March 23, 2012

DIY Baby Belt

Mommy's All Star had a little problem. None of his pants fit on his skinny milk belly! Mama bought all these cute pants and he couldn't wear any of them. So Mama made him a belt!

I used the same tutorial that I did when I made myself a belt, but I made it much smaller.

A tiny belt for a tiny waist is a little harder to work with, but it does the trick!

Connor loves his new jeans!

Wednesday, March 14, 2012

No-Sew Baby Bow Tie

Connor had his Hebrew naming ceremony recently and, of course, I wanted to dress him up extra cute. I love all the little preppy baby outfits, so his sweater vest, polo & khakis were perfect. But to add a little extra fun, I thought he needed a cute accessory - the bow tie!

This literally took me less than 10 minutes so it's a great craft if you only have a little time. I cut out two strips of fabric - one for the bow and a skinny one to loop around the bow.
(I'm being blinded by plaid on leopard print. Sorry!)
For each strip, I folded each long side in towards the middle so the unfinished edges wouldn't show. Then I ironed the folds to flatten them.

To make the bow, I took the long strip and folded each edge towards the middle. The ends needed to overlap slightly, but I cut off the excess that I didn't need. (A baby boy needs a lot less of a boy tie than a toddler)
I used some Elmer's glue to adhere the top end to the bottom end where they overlapped.
I also used Elmer's glue for the strip that wrapped around the bow and then I held it tight while it dried.

I slipped a 1/4 in wide piece of elastic inside and tied a knot at the ends.
I took the knotted part of the elastic and slid it around so it was inside the bow tie.

And here's my little guy showing off his plaid bowtie!


Related Posts with Thumbnails